Thursday, August 2, 2012

Craft Camp - Birdhouses!

BIRDHOUSES!
The kids were so excited to see the paint and paintbrushes on the tables when they came in this morning. They really do love to paint. Only one kid refused to wear an apron (except for the ones who are old enough not to!)

For some reason, this kid likes the color pink.

This is the craft camp that he has been looking forward to all summer. He was pretty excited when I told him he could paint his birdhouse however he wanted.

She just likes to be in on the fun and be just like all the "big kids."Who Am I? Birds  (A Sneak A Peek Series)
While the birdhouses were drying, we read "Who Am I? Birds" (A Sneak a Peek Series)

The kids had a great time pretending to be all the different birds in the book. This picture shows them demonstrating a pink flamingo sleeping.
Why does a flamingo sleep while standing on one leg? It would fall over if it lifted the other leg! HA! HA! HA!

For snack, we had rice krispie bird nests with eggs. Make rice krispies treats and while they are still warm, shape them into a nest. After they cool off, place a few M & M's or other round candies in the middle of the "nest."

These were a big hit!


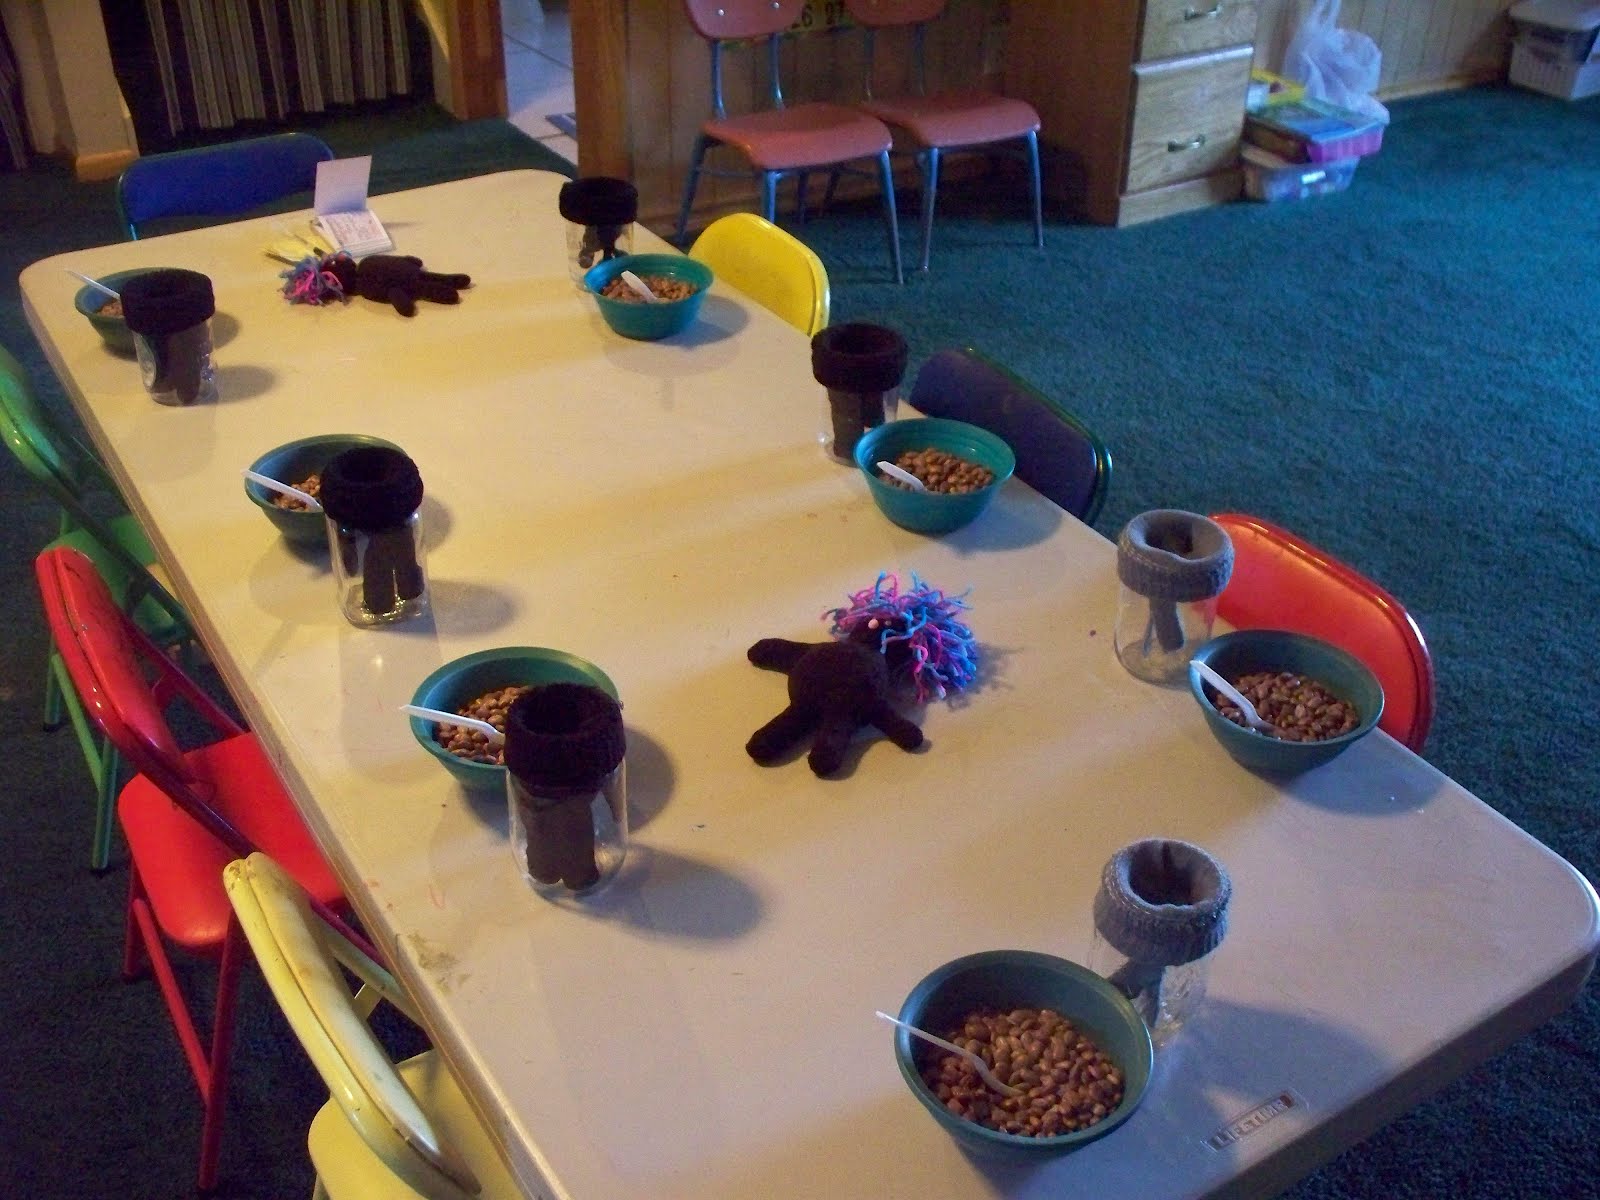
This week we got to do things a little differently. My 4 nieces were staying with us for a few days so I put each one of them in charge of an activity and we split into 4 groups and did centers. The kids loved it!

In this center, the kids are playing "Which is different?" In each row there is one bird that is different than the others. The kids were instructed to place a rock on each of the birds that were different. Some are easier than others to figure out.
In this center, the kids are putting together mini puzzles of birds. Some are kind of tricky.

Here they are graphing.

Which is different?

This one is a shape matching game. They had to move the yarn from the bird to the shape that matches the one on the birds belly.


The finished products!
He must of painted over the yellow.

Thursday, July 26, 2012

Craft Camp - Apples!

Apples, Apples, Apples Everywhere!
We got to paint at craft camp again today. (The kids really do love painting!)

All set and ready for the kids to start painting. The blocks are made from a 2 x 4 and I just had my husband cut them into 6 inch lenghths.

This is the cute apple block that we made.
I did not have a pattern for the leaf, the stem, and the hands so I just made up my own. I used craft foam and just hot glued them right to the block after it had dried.

As usual, when painting it is very important to wear your apron!

After everyone finished painting, we played "Apple Picking" Each player (2-3) chooses a color pom-pom (yellow, green or red) and then the youngest player rolls the die and places that many pom-poms on the mat. The next player rolls and places that many of his color on the mat. When the mat is full, each player takes their color pom-poms off the mat and counts them. The player with the most pom-poms, wins.
They really had fun playing this game!

How Do Apples Grow?
We read "How do apples grow?" by Betsy Maestro. This was a very informational book and I had to skip over a few parts because it was way too mature for some of the kids. Good book though. Fun information about apples.

We had apples for snack. They loved it! Some wanted it cut and cored and others were happy just eating the apple whole.

At the very end of our time we put an apple puzzle together. In order to choose a puzzle piece, each child had to tell me something new that they had learned about apples. It was interesting to hear their comments.
She is so pleased with her work. (She had a little help)

Thursday, July 19, 2012

Craft Camp - Alien Space Ship!

This week we were painting again so all the kids came in and put on their aprons so that they could get started. They each got to choose their paint color for the space ship and for the alien.

After we painted we played with the magnet pages (A is for Astronaut, M is for Moon, and S is for Spaceship.) I got the pages here: http://www.makinglearningfun.com/ and we used brown and white rocks (moon rocks) to fill in the circles on the pages.

We read "Me and My Place in Space" by Joan Sweeney.

Product Details

We put the planets on the orbits. (I made the background out of grey felt and then I painted (with puff paints) 3 green ovals for the orbits. I cut the planets out of different colors of felt and put velcro on the back.
After we put all the planets on, we threw "comets" at it like a target. Points went like this: Planet = 20, Orbit = 10, and Outer Space = 5.

For the comets, I got some little plastic balls from the Dollar Tree and I put strips of velcro on them so that they would stick when they hit the felt. The kids loved this game!


Then we rolled a dice to "Build a Rocket"


Here is the finished product. An Alien with a spaceship!

They all turned out so different.


Benjamin drew a happy face on one side and...

a grumpy, mean face on the other side.
If you want to make your own, here are the instructions:

ALIEN SPACESHIP
Materials Needed:
2- two inch terra cotta saucers
1- wooden doll peg
3- corks
6- rhinestones
paint
paintbrush
hot glue

Photo: Craft Camp next week (July 19th.)  We will be learning about space, astronauts, and aliens. :)  Leave a message here to sign up your child or for more info.

Directions:
Glue the two pots together (like shown above) with hot glue, allow to cool.
Paint color of your choosing (may need 2 coats).
Paint doll peg (Alien) the color of your choosing.
Paint corks black.
Allow for all painted items to dry.
Glue the 3 corks to the bottom.
Glue the alien to the top.
Decorate with rhinestones.


Other sites with space themed activities:

Wednesday, July 11, 2012

Craft Camp - Monster Knit Wits!


To start craft camp off this week, the kids spooned dry beans into the gloves for their monsters. I got the idea for this craft here: http://familyfun.go.com/winter/winter-crafts/more-winter-crafts/knit-wits-660693/

I put the gloves into a pint jar so that it would be easier for the kids to get the beans in the glove.


This was a really great idea. We had very little spilling and it was super easy for the kids to fill their gloves.


Even Gracie did it without spilling very many beans.

See how easy...he doesn't even have to be looking at the glove and the beans get into the glove!

After filling the gloves with beans, we finished them off by placing a styrofoam ball in for the head and gluing some yarn in for hair. We also glued 2 small google eyes and a small pompom for the nose.


Photo: This is what we will be making for craft camp on July 12, "knit monsters"...super fun, huh? If you want to register your child(ren), leave me a message here.


We read "Jeepers Creepers" by Laura Leuck. This book is so cute. It has illustrations of the cutest monsters and it is an ABC book.

Product Details

We played a monster matching game by throwing a bean bag onto two matching monsters.

Then each kid told us the name of the letters on their cards.
I got the cards from here: http://www.2teachingmommies.com/ Super cute!

Then we worked with a partner to spell the word: MONSTER.

I put the letters for the word plus three additional letters in each bag and had the kids copy the monster spelling page to spell the word.


For snack, we made our own monsters out of marshmallows and toothpicks.


Each kid got 1 big marshmallow and 10 little ones. Some had 3 legs and 2 arms and 5 eyes.

Some had 2 arms, 2 legs, and 4 eyes. After we made our monster snack, we ate the marshmallows.

We needed to get some wiggles out so we danced around a little while we listened to "Monster Mash" on YouTube.

Then we made our scariest monster face.

It was almost time to go so we read a story to our monsters. "Another Monster at the end of this book" by Jon Stone.

Product Details


These turned out so cute!


Some other sites with monster themes: